

An organized pantry is crucial for both efficiency and food safety, and that’s why you need a comprehensive Pantry Organization Guide. When you keep your pantry neat, you can find items quickly and reduce food waste. Proper food storage and labeling, as highlighted in the Pantry Organization Guide, help prevent foodborne illnesses. According to food safety authorities, improper storage can lead to expired products and health risks. By understanding shelf life, you ensure that your food stays fresh longer. So, why not take some actionable steps today? Start organizing your pantry with these simple tips from the Pantry Organization Guide and enjoy the benefits of a well-ordered space!
Key Takeaways
Use airtight containers to keep dry goods fresh and safe from pests.
Label everything clearly to make finding items quick and easy.
Organize your pantry by grouping similar items together to reduce waste.
Regularly check expiration dates to ensure food safety and freshness.
Utilize vertical space with adjustable shelves and pull-out drawers for better access.
Storage Tips for a Perfect Pantry
Best Containers to Use
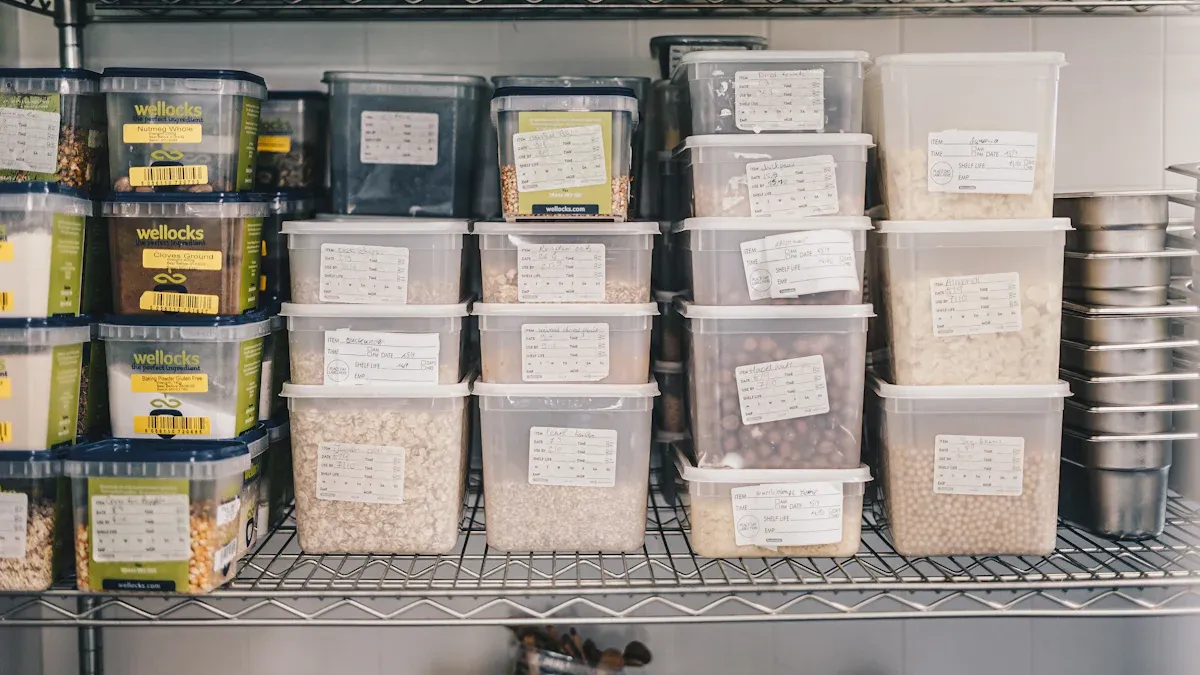
When it comes to creating a perfect pantry organization, the right containers make all the difference. You should invest in storage containers that are not only functional but also visually appealing. Here are some tips to consider:
Airtight Containers: These are essential for keeping your dry goods fresh. Airtight containers help maintain the quality of items like flour, sugar, and pasta by preventing oxidation and moisture loss. They also act as a barrier against pests and bacteria, ensuring your food stays safe for longer.
Clear Containers: Using clear containers allows you to see what you have at a glance. This visibility helps you avoid buying duplicates and keeps your pantry looking neat. You can easily spot when you need to restock items.
Uniform Sizes: Choose containers that are uniform in size. This makes stacking easier and maximizes your pantry space. You can create a clean and organized look that’s easy to maintain.
Elevating and Organizing Items
To achieve a well-organized pantry, you need to utilize vertical space effectively. Here are some strategies to elevate and organize your items:
Adjustable Shelving Units: These allow you to customize the height of your shelves based on your needs. You can create zones for different types of food, making it easier to find what you need quickly.
Wire Racks on Doors: Installing wire racks on the inside of your pantry doors adds extra storage tiers. This is a great way to store spices, snacks, or small jars without taking up valuable shelf space.
Pull-Out Drawers or Baskets: These provide convenient access to items stored at the back of deep cabinets. You can easily pull out a drawer to see everything you have, reducing the chances of food waste.
Sliding Shelves: Consider using sliding shelves for deeper cabinets. They allow you to reach items without having to dig through everything, making your cooking experience smoother.
By creating designated zones for different food types, you improve accessibility and reduce food waste. Grouping similar items together helps you track inventory and ensures you use older items first. This simple organization tip can save you money and keep your pantry looking tidy.
Labeling for an Organized Pantry
Effective Labeling Techniques
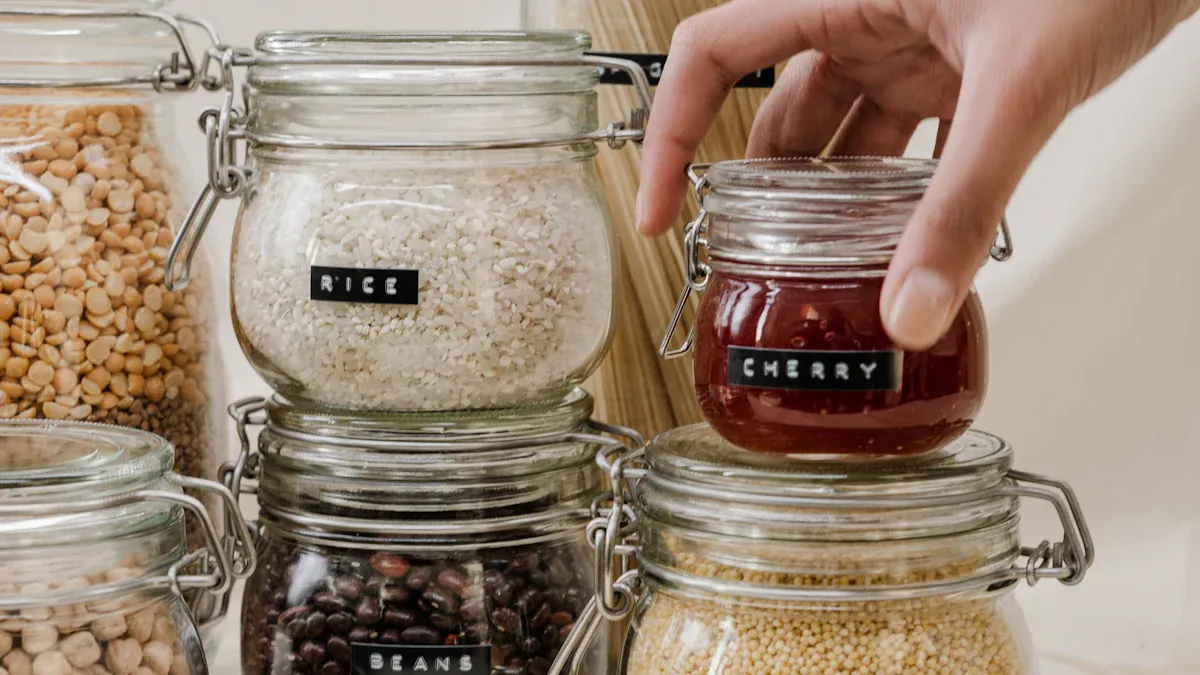
Labeling is essential for maintaining an organized pantry. When you label everything, you create a system that makes it easy to find what you need. Here are some effective labeling techniques to consider:
Broad Labels: Use general terms like “snacks” instead of specific brand names. This approach reduces the need for frequent changes and keeps your pantry looking fresh.
Consistent Placement: Place labels in the same location on containers or shelves. This consistency improves visibility and helps you quickly locate items.
Uniform Fonts and Sizes: Maintain the same font and size across all labels. This uniformity enhances recognition and reduces visual clutter.
Tip: Consider using customizable foil labels for a touch of class and personality in your pantry organization. They can add a stylish flair while keeping things functional.
Information to Include on Labels
When labeling your containers, it’s crucial to include specific information to ensure food safety and proper rotation. Here’s what you should include:
Name of the food/drink
List of ingredients and allergens (if applicable)
Date prepared or opened
Use by date
Weight or volume (if applicable)
Including these details helps you track expiration dates and ensures compliance with safety regulations. Research shows that understanding and frequently checking date labels significantly reduces food waste in households. When you know what needs to be used up soon, you make informed decisions about food consumption and disposal.
To enhance your pantry organization, consider these creative labeling ideas:
Labeling Idea | Description |
|---|---|
Categorization | Label food categories such as snacks, baking ingredients, canned goods, etc. to easily find items. |
Color-Coding | Use color-coded labels to quickly identify certain types of foods (red for spicy, green for healthy, etc.). |
Expiration Dates | Clearly label expiration dates so you know what needs to be used up soon. |
Specialty Diet Items | Label specialty diet items such as gluten-free and dairy-free. |
Creative Labels | Use fun labels to make your pantry look cool while helping you find food faster. |
Chalkboard Labels | Use chalkboard labels to organize your pantry staples and make label changes as needed. |
Leftovers | Label leftovers stored in your pantry with reheating instructions. |
Preprinted Labels | Use preprinted pantry organization labels to save time and effort. |
A well-organized kitchen allows for quicker meal preparation and creates a more relaxed cooking atmosphere. When every item has a designated spot, it becomes easier to see what you have, plan meals, and maintain a varied diet. Utilizing clear containers and labels helps keep everything visible and easy to identify, enhancing the speed and ease of meal preparation.
Shelf Life Insights
Understanding Expiration Dates
Expiration dates can be confusing, but understanding them is key to keeping your pantry organized and your food safe. Here’s a quick breakdown of common date types:
Date Type | Meaning |
|---|---|
Sell by | Indicates when a product should be sold; still safe to consume after this date, but may spoil quickly. |
Best by/before | Suggests when a product will be at its best quality; safe to consume after this date, but may not taste as fresh. |
Use by | Similar to ‘best by’; indicates the date for peak quality consumption. |
Many people mistakenly believe that all these dates indicate when food is unsafe to eat. In fact, about 90% of Americans misinterpret expiration dates, leading to unnecessary food waste. You might be surprised to learn that the average American throws away nearly a pound of food daily due to confusion over these dates!
Tips to Extend Shelf Life
You can take several steps to extend the shelf life of your pantry staples. Here are some effective tips:
Store items in airtight containers to keep them fresh longer.
Keep pantry staples in a cool, dark place to prevent spoilage.
Regularly check expiration dates to ensure freshness.
Use products before they expire to minimize waste.
Consider freezing items that can be frozen to halt microbial growth.
Dry products to extend their shelf life by removing moisture.
Additionally, watch for signs of spoilage. For dry goods and canned foods, look out for:
Unpleasant Smell: A foul smell indicates spoilage, and the food should be discarded immediately.
Bubbles in the Liquid: Excessive bubbles can suggest gas buildup from bacteria, which is a sign of spoilage.
By understanding these aspects of shelf life, you can reduce the risk of foodborne illness and make the most of your pantry organization efforts. Remember, a well-organized pantry not only saves you time but also helps you keep your food safe and fresh!
A well-organized pantry is essential for a stress-free cooking experience. By following the tips on storage, labeling, and understanding shelf life, you can significantly reduce food waste and enhance your kitchen efficiency. Remember, practical organization beats perfection. Embrace the methods that work best for you, and don’t hesitate to adjust them as your needs change.
We’d love to hear about your pantry organization journey! Share your tips or experiences in the comments below. Together, we can create a community focused on efficient pantry management!
FAQ
What are the best containers for pantry storage?
You should use airtight, clear containers for dry goods. They keep food fresh and allow you to see contents easily. Uniform sizes help maximize space and create a tidy look.
How often should I check my pantry for expired items?
Check your pantry every few months. Regularly inspect expiration dates and rotate items. This practice helps you use older products first and reduces food waste.
Can I store canned goods in a warm place?
No, avoid storing canned goods in warm areas. Heat can affect the quality and safety of the food. Keep them in a cool, dark place for optimal shelf life.
How can I label my pantry items effectively?
Use clear, broad labels that describe the contents. Include expiration dates and any allergens. Consistent placement and uniform fonts enhance visibility and organization.
What’s the difference between “sell by” and “use by” dates?
“Sell by” indicates when a product should be sold, while “use by” suggests when it’s best consumed. Both dates don’t mean food is unsafe after, but quality may decline.